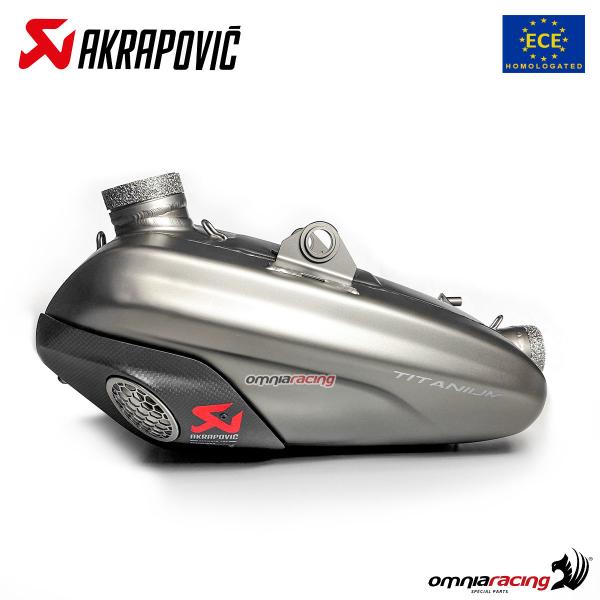
So I just bought some of these and of course no instructions. The dealer sent me the PDF and I was just going through it. Had anyone installed these? In the instructions you are ripping the bike apart for slip ons!!!! If these instructions are correct then you gotta be kidding me. I've installed full systems with out taking tanks off, removing the arse end etc. This is just stupid of these instructions are correct. For the full system I get it.

Akropovic Slip on install
Monsoon
Discussion starter
14 posts
·
Joined 2021
- Add to quote Only show this user
So I just bought some of these and of course no instructions. The dealer sent me the PDF and I was just going through it. Had anyone installed these? In the instructions you are ripping the bike apart for slip ons!!!! If these instructions are correct then you gotta be kidding me. I've installed full systems with out taking tanks off, removing the arse end etc. This is just stupid of these instructions are correct. For the full system I get it.
3,615 posts
·
Joined 2011
The PDF they sent you sounds like it's for a full system. Instructions that are first written in Italian and translated to English aren't always that good. Often one set of instructions is written for multiple systems. You apply what pertains to what system you buy from those instructions. Slip on or full system. I wouldn't follow those instructions. Take apart only what you see fit to remove the stock slip on.
Sent from my iPhone using Tapatalk
Sent from my iPhone using Tapatalk
3,615 posts
·
Joined 2011
I don't know where to get the instructions. I would think it's a couple of mounting points and a few clamps that need to be taken apart to allow the muffler to come off. Some people have reported that removing the muffler takes a bit of patience and work.
Sent from my iPhone using Tapatalk
Sent from my iPhone using Tapatalk
13,839 posts
·
Joined 2006
I this what you got?
![Image]()
I havent done it yet but from what I gather you need to loosen the header bolts at both cylinder banks and there's a bracket on the right side rearset that needs to come off, you also have to remove the exhaust valve motor and cables.
Here's a link to the Arrow instructions https://admin.arrow.it/img/documents/3884633.PDF
3,615 posts
·
Joined 2011
WTF? So it's almost as much work as a full system since you have to loosen the system at both heads? I'd be installing a full Arrow system if that's supposed to be done. Sorry if I mislead the OP. A slip on usually doesn't involve this much grief.
Sent from my iPhone using Tapatalk
Sent from my iPhone using Tapatalk
13,839 posts
·
Joined 2006
Because you have two connections to a solid part at right angles to each other. You need to loosen each end to get it to pivot down enough to clear the rear pipe. Most are just prying and bending stuff - it can obviously be done but its a lot of stress and flexing of parts. If the head bolts are loose it should be able to rock enough to let things clear.
Monsoon
Discussion starter
14 posts
·
Joined 2021
So I'm hoping someone can help me in this one. I THINK this piece might be from the fairings when I pulled them off but I'm not sure. Can anyone recognize this. I looks like it's just a small rubber donut grommet with some lithium grease on it and MAYBE half a centimeter in diameter if that
Attachments
-
1.9 MB Views: 270
336 posts
·
Joined 2009
It may be from the bolts that mount the exhaust to the bike. One on each side, and they both have rubber grommets like that.
336 posts
·
Joined 2009
On my arrow I believe I reused the oem grommets for the left side, but the right side didn’t use them.
Monsoon
Discussion starter
14 posts
·
Joined 2021
Think I found it. Looks like from one of the fairings on the side of the gas tank. There's a little nipple in between the velcro. The left side has a rubber grommet on it but the right side has a nipple without a rubber grommet and the nipple had lithium grease on it. I'm assuming that probably where it goes.
1,520 posts
·
Joined 2011
Those fall out almost every time, I ordered some spares from Ducati Omaha.
Monsoon
Discussion starter
14 posts
·
Joined 2021
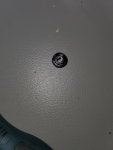
Shoot. I put back together my bike after doing the slip ons. This bolt was in the group of exhaust parts. I went through all the instructions to determine where this came from and I am at a loss. As you can tell it a bit dirty. My bikes are usually 9.5/10 for cleanliness so this tells me it's from down near the bottom. I'm going through everything and am stumped. Any of you gurus have an idea? Much appreciated. Thx. I gotta start using a camera step by step what I'm doing
Attachments
-
641.1 KB Views: 220
-
560.8 KB Views: 117
Monsoon
Discussion starter
14 posts
·
Joined 2021
That's what I was thinking squirrel.. I've been going over it a few times and just can't spot it. The good thing is, I probably don't need it since it probably part of the stock exhaust. Its driving me crazy though and don't want to drive it until I can narrow it down. 😳
Monsoon
Discussion starter
14 posts
·
Joined 2021
Like I said this is definitely not a "slip on". More like a 3/4 exhaust. Putting the thing back together, another story. If you look at the bike from the rear, the left hand rear header has three bolts/nuts. One at the 12 o'clock, 4 o'clock and 8 o'clock position. The one at the 4 o'clock is almost impossible to get to. I've had to alter some wrenches to get at that thing and still was damn near impossible. Don't know how the mechanics do it. Of someone knows, please let me know. THEN when I put the tank back on it has 2 bolts at the rear of the tank and two at the side about mid way up. On the left side the rubber grommet sits between the two tabs. On the inner tab is a flange nut "welded" to the tab and that's what you anchor your bolt to. Will it calls for 6 NM of torque. At about 5, the flange nut dislodged from the tab. Great! So I had to modify another wrench to fit behind the tab and luckily it worked pretty good and was about to tighten it. Also made sure I could take it off for future work on the bike. So I've done exhaust work in my zx14, Harley vrod, R1, S1000RR and this thing. This bike by far it's the biggest PITA hands down. Sorry for my long explanation. You probably know the bike better than I do but just in case you never did the exhaust yet.
3 posts
·
Joined 2021
I did this recently I was about to loosen the rear header bolts with an assortment of extensions etc but the proper way to do it is to loosen the rear subframe. It’s not a hard job to remove the tank and subframe and once it’s removed the job becomes incredibly easier. I know this because I had to remove the subframe to change the heat shield for a carbon one so do both jobs at once if you intend on doing it yourself.
I used the arrow instructions which don’t list removing the subframe and obviously don’t mention that you need to reuse 2 of the washers from the factory muffler in the akra system.
don’t actually remove the subframe. Just lift it up I used a ratchet strap from the roof
I used the arrow instructions which don’t list removing the subframe and obviously don’t mention that you need to reuse 2 of the washers from the factory muffler in the akra system.
don’t actually remove the subframe. Just lift it up I used a ratchet strap from the roof
3 posts
·
Joined 2021
Wow you need better tools.. I loosened and tightened all the bolts with the subframe on. When I removed the subframe later for the heat shield change I thought fk me removing it would have made the job a walk in the park.
Monsoon
Discussion starter
14 posts
·
Joined 2021
I think I got more tools than the average mechanic! 3 tool chest full of everything you can think of. Like I said I could get the socket on the header but but it wasn't straight on. How did that header pipe not get in your way? It laterally bends right in front and in the way of the bolt
-
?
-
?
-
?
-
?
-
?
-
?
-
?
-
?
-
?
-
?
-
?
-
?
-
?
-
?
-
?
-
?
-
?
-
?
-
?
-
?
- posts
- 2.6M
- members
- 100K
- Since
- 2005
A forum community dedicated to all Ducati owners and enthusiasts. Come join the discussion about performance, modifications, troubleshooting, superbike racing, maintenance, and more!
Explore Our Forums


